
LangSmith production setup turns a useful tracing tool into the backbone of a multi-agent observability pipeline. What we’re building: a small Python LangGraph multi-agent workflow instrumented with LangSmith tracing, dataset-backed evaluation, and regression monitoring. Prereqs: Python 3.10+, a LangSmith account, an API key, and at least one model provider key supported by LangChain. If you need background first, see our guides to what LangGraph is, a deeper LangGraph multi-agent tutorial, and our comparison of LangSmith vs. Langfuse.
What we’re building and what you need
~140
Lines of Python in the core example
Graph, tracing, dataset eval, and metadata
2
Worker agents
Research and writer under a supervisor
1
Hosted observability surface
Tracing, experiments, and automations in LangSmith
The goal is a production-ready observability loop for a multi-agent app: trace every run, label runs with useful metadata, evaluate behavior against a dataset, and watch for regressions over time. LangSmith is the natural fit if your app already uses LangChain and LangGraph because tracing hooks, evaluation APIs, and the hosted UI are designed to work together from the same run tree.
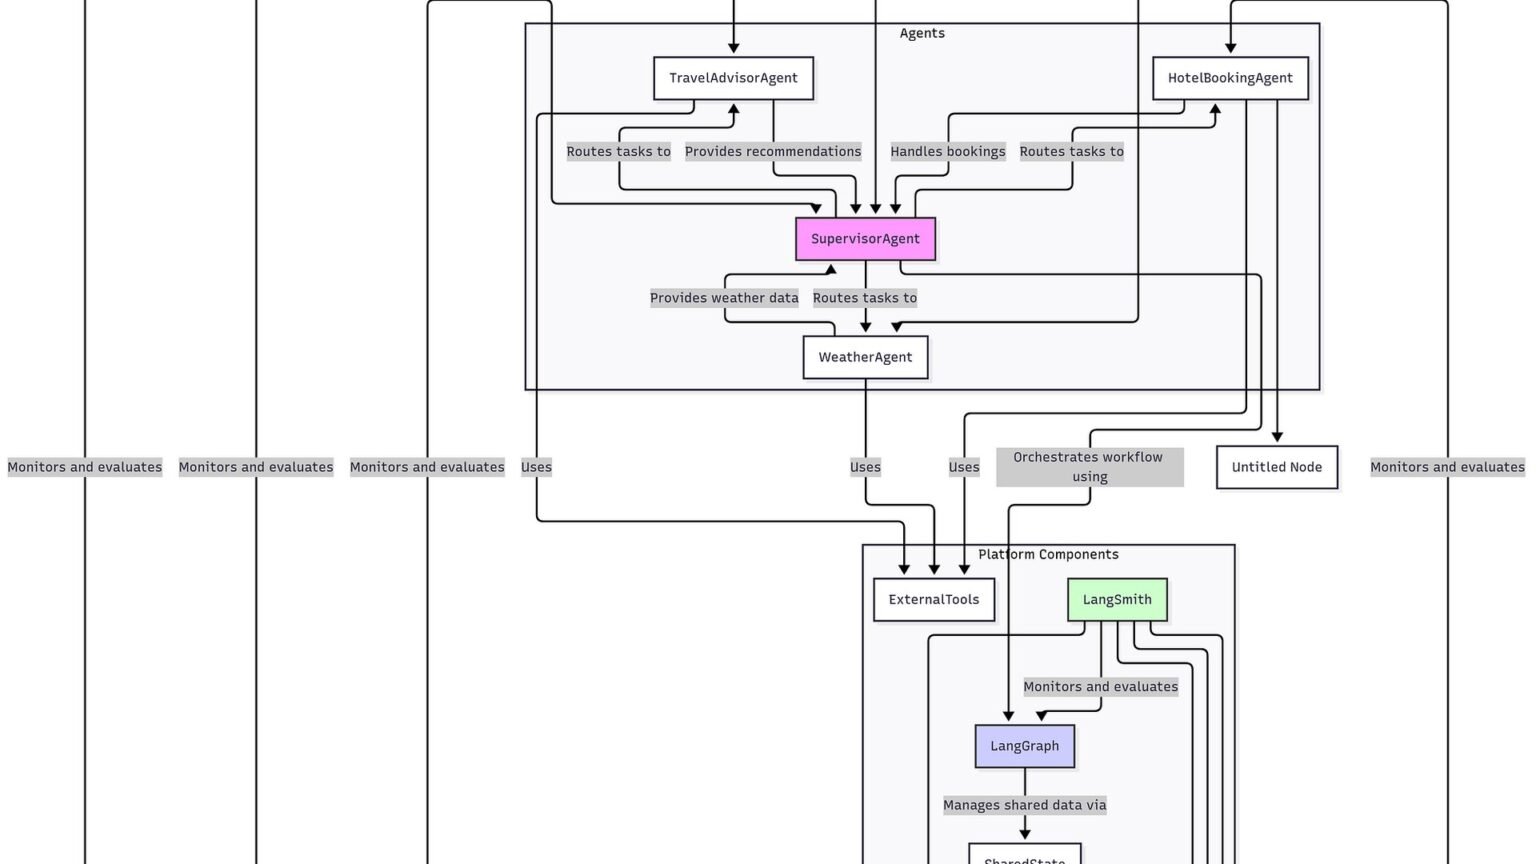
In this tutorial, the app is a simple supervisor-style graph with two workers: a research agent and a writer agent. The supervisor routes the task, the workers do their part, and LangSmith captures the full execution path. That gives you a concrete baseline for debugging handoffs, latency spikes, and prompt regressions in a graph that is more realistic than a single-chain demo.
You’ll need a LangSmith account and API key from smith.langchain.com, plus Python packages for LangChain, LangGraph, and LangSmith. LangChain’s docs also cover environment-based tracing setup, while LangSmith’s docs explain projects, datasets, experiments, and automations in the hosted product.
📌 Prereqs. Python 3.10+, LANGSMITH_API_KEY, LANGSMITH_TRACING=true, and at least one model provider key such as OPENAI_API_KEY. This tutorial uses LangChain, LangGraph, and the LangSmith Python SDK.
python -m venv .venv
source .venv/bin/activate
pip install -U langchain langgraph langsmith langchain-openai

export LANGSMITH_API_KEY="your_langsmith_key"
export LANGSMITH_TRACING="true"
export LANGSMITH_PROJECT="multi-agent-prod-tutorial"
export OPENAI_API_KEY="your_model_provider_key"
Stage 1: Create a minimal multi-agent LangGraph app
We’ll start with a compact graph so the observability patterns stay clear. LangGraph models workflows as nodes and edges, with shared state passed between them. For a refresher on graph concepts, state, and routing, see the official LangGraph docs at langchain-ai.github.io/langgraph and our own LangGraph explainer.
The example below uses a typed state object, a supervisor node that decides which worker should act next, and two worker nodes. The graph ends after the writer produces a final answer. This is enough to generate nested traces in LangSmith that are easy to inspect in the UI.
from __future__ import annotations

from typing import Literal, TypedDict

from langchain_openai import ChatOpenAI
from langgraph.graph import END, StateGraph


class AgentState(TypedDict, total=False):
 user_request: str
 route: Literal["research", "writer", "done"]
 research_notes: str
 final_answer: str


llm = ChatOpenAI(model="gpt-4o-mini", temperature=0)


def supervisor(state: AgentState) -> AgentState:
 prompt = f"""
You are a supervisor for a two-agent workflow.
Choose exactly one route: research, writer, or done.

User request: {state['user_request']}
Research notes so far: {state.get('research_notes', '')}
Final answer so far: {state.get('final_answer', '')}

Rules:
- If no research notes exist, choose research.
- If research notes exist and no final answer exists, choose writer.
- If final answer exists, choose done.
Return only the route word.
""".strip()
 route = llm.invoke(prompt).content.strip().lower()
 if route not in {"research", "writer", "done"}:
 route = "research"
 return {"route": route}


def research_agent(state: AgentState) -> AgentState:
 prompt = f"""
You are a research agent.
Summarize the key facts needed to answer this request in 5 bullet points.

Request: {state['user_request']}
""".strip()
 notes = llm.invoke(prompt).content
 return {"research_notes": notes}


def writer_agent(state: AgentState) -> AgentState:
 prompt = f"""
You are a writer agent.
Use the research notes to answer the user's request clearly and concisely.

Request: {state['user_request']}
Research notes:
{state.get('research_notes', '')}
""".strip()
 answer = llm.invoke(prompt).content
 return {"final_answer": answer}


def route_after_supervisor(state: AgentState) -> str:
 return state["route"]


graph = StateGraph(AgentState)
graph.add_node("supervisor", supervisor)
graph.add_node("research", research_agent)
graph.add_node("writer", writer_agent)

graph.set_entry_point("supervisor")
graph.add_conditional_edges(
 "supervisor",
 route_after_supervisor,
 {
 "research": "research",
 "writer": "writer",
 "done": END,
 },
)
graph.add_edge("research", "supervisor")
graph.add_edge("writer", "supervisor")

app = graph.compile()

if __name__ == "__main__":
 result = app.invoke({"user_request": "Explain retrieval-augmented generation for a CTO in 150 words."})
 print(result["final_answer"])
Stage 2: Turn on LangSmith tracing and make runs readable
If LANGSMITH_TRACING=true is set, LangChain and LangGraph runs can be captured automatically in LangSmith. The official setup docs are the best reference for environment variables, SDK installation, and project configuration: docs.smith.langchain.com.
Automatic tracing is only the start. In production, the difference between a useful trace and a noisy one is metadata. You want to tag runs with app version, environment, tenant or workspace ID where appropriate, and a stable use case label. That makes it possible to filter traces later when one customer reports a failure or a new prompt version starts drifting.
LangChain run configuration supports tags and metadata. The exact shape of your metadata is up to you, but consistency matters more than completeness. Pick a small schema and keep it stable across releases.
Pros
Cons
📌 Production habit. Treat tags and metadata as part of your release process. If a run cannot be filtered by environment, version, and workflow name, it will be harder to debug under load.
from langchain_core.runnables import RunnableConfig

config = RunnableConfig(
 tags=["tutorial", "supervisor-graph", "staging"],
 metadata={
 "app_version": "2026.05.20",
 "environment": "staging",
 "workflow": "research-writer-supervisor",
 "owner": "platform-eng",
 },
)

result = app.invoke(
 {"user_request": "Explain model context protocol in plain English."},
 config=config,
)

print(result["final_answer"])
| Field | Example | Why it matters |
|---|---|---|
| project | multi-agent-prod-tutorial | Separates this app from experiments |
| tags | prod, supervisor-graph | Fast filtering in the LangSmith UI |
| metadata.app_version | 2026.05.20 | Compare behavior across releases |
| metadata.environment | staging | Avoid mixing test and production traces |
Stage 3: Add explicit trace boundaries for custom logic
Real production graphs usually include retrieval, ranking, tool calls, post-processing, and guardrails that sit outside a single model invocation. LangSmith’s SDK lets you create explicit trace spans around custom logic so the run tree reflects the full workflow rather than only LLM calls. That is where multi-agent observability becomes genuinely useful: you can see whether the failure came from routing, retrieval, a tool, or the model itself.
The snippet below wraps a custom retrieval function with LangSmith tracing. Even if your retrieval is just a placeholder today, instrumenting it now will save time when you swap in a vector store or internal search API later.
from langsmith import traceable


@traceable(name="retrieve_context", run_type="tool")
def retrieve_context(query: str) -> str:
 # Replace this with your real retrieval layer.
 docs = [
 "RAG combines retrieval with generation.",
 "Retrieved documents are injected into the model context.",
 "Quality depends on chunking, ranking, and grounding discipline.",
 ]
 return "\n".join(docs)


def research_agent(state: AgentState) -> AgentState:
 context = retrieve_context(state["user_request"])
 prompt = f"""
You are a research agent.
Use the retrieved context to summarize the key facts needed to answer the request.

Request: {state['user_request']}
Context:
{context}
""".strip()
 notes = llm.invoke(prompt).content
 return {"research_notes": notes}
“The fastest way to lose observability in an agent system is to trace only model calls and ignore the glue code that actually determines behavior.”
Alatirok editorial guidance
Stage 4: Create a LangSmith dataset for repeatable evaluation
Tracing tells you what happened on one run. Evaluation tells you whether the system is getting better. LangSmith supports datasets and experiments so you can run the same app version, prompt change, or graph change against a fixed test set. The product docs cover datasets, experiments, and evaluation workflows in the hosted platform at docs.smith.langchain.com.
For a multi-agent app, your dataset should reflect the actual failure modes of the graph. Include tasks that require routing, tasks that should skip research, tasks with ambiguous wording, and tasks where the writer must stay within a strict format. Keep the first dataset small and representative rather than large and random.
⚠️ Dataset design. Do not build your first eval set from only easy prompts. Multi-agent regressions often show up in routing ambiguity, formatting constraints, and long-tail tool behavior.
from langsmith import Client

client = Client()

dataset_name = "multi-agent-prod-tutorial-dataset"

dataset = client.create_dataset(
 dataset_name=dataset_name,
 description="Representative prompts for a supervisor-style research and writing graph.",
)

examples = [
 {
 "inputs": {"user_request": "Explain retrieval-augmented generation for a CTO in 150 words."},
 "outputs": {"must_include": ["retrieval", "generation"], "max_words": 170},
 },
 {
 "inputs": {"user_request": "Write a 3-bullet summary of model context protocol for a product manager."},
 "outputs": {"must_include": ["tools", "context"], "max_bullets": 3},
 },
 {
 "inputs": {"user_request": "Define agent observability in two sentences."},
 "outputs": {"must_include": ["trace", "evaluation"], "max_sentences": 2},
 },
]

for ex in examples:
 client.create_example(
 dataset_id=dataset.id,
 inputs=ex["inputs"],
 outputs=ex["outputs"],
 )

print(dataset.id)
Stage 5: Run LLM-as-judge evals against the graph
Best practice: combine deterministic checks with a narrow judge rubric
LangSmith supports programmatic evaluation, including custom evaluators and model-based judging. In practice, teams often combine a few deterministic checks with one or two LLM-as-judge rubrics. Deterministic checks catch obvious failures cheaply. The judge model handles nuance such as relevance, completeness, or instruction following.
The example below defines a simple application function, then uses a custom evaluator that asks a judge model to score the output for relevance and format compliance. Keep the rubric narrow. Broad prompts like “is this good?” are hard to compare across experiments.
import json
from typing import Any

from langsmith import Client
from langchain_openai import ChatOpenAI

client = Client()
judge = ChatOpenAI(model="gpt-4o-mini", temperature=0)


def target(inputs: dict) -> dict:
 result = app.invoke(inputs)
 return {"output": result.get("final_answer", "")}


def deterministic_checks(inputs: dict, outputs: dict, reference_outputs: dict) -> dict:
 text = outputs.get("output", "")
 must_include = reference_outputs.get("must_include", [])
 missing = [term for term in must_include if term.lower() not in text.lower()]
 score = 1.0 if not missing else 0.0
 return {
 "key": "required_terms",
 "score": score,
 "comment": "Missing terms: " + ", ".join(missing) if missing else "All required terms present",
 }


def llm_judge(inputs: dict, outputs: dict, reference_outputs: dict) -> dict:
 rubric = {
 "task": "Score whether the answer follows the requested format and addresses the user request.",
 "score_scale": "0 or 1",
 "criteria": [
 "The answer is relevant to the request.",
 "The answer follows explicit format constraints when present.",
 "The answer is clear and not obviously self-contradictory.",
 ],
 }
 prompt = f"""
You are grading an LLM output.
Return strict JSON with keys: score, reasoning.

Rubric:
{json.dumps(rubric)}

Inputs:
{json.dumps(inputs)}

Output:
{json.dumps(outputs)}

Reference expectations:
{json.dumps(reference_outputs)}
""".strip()
 response = judge.invoke(prompt).content
 parsed: dict[str, Any] = json.loads(response)
 return {
 "key": "llm_judge",
 "score": float(parsed["score"]),
 "comment": parsed["reasoning"],
 }

experiment_results = client.evaluate(
 target,
 data=dataset_name,
 evaluators=[deterministic_checks, llm_judge],
 experiment_prefix="supervisor-graph-baseline",
)

print(experiment_results)
| Evaluator type | Best use | Example |
|---|---|---|
| Deterministic | Hard constraints | Word count, bullet count, required phrase |
| LLM-as-judge | Nuanced quality | Relevance, completeness, groundedness |
| Human review | High-stakes edge cases | Customer-facing policy or compliance outputs |
Stage 6: Compare experiments before you ship
Once you have a baseline experiment, the next step is to compare it against a changed graph, prompt, or model. LangSmith’s experiments UI is built for this workflow: run the same dataset against two versions and inspect score deltas, failing examples, and trace-level differences. This is where a production setup starts paying off, because you can answer a release question with evidence rather than intuition.
A simple release pattern is: run the baseline on your current main branch, run the candidate on the new branch, compare aggregate scores, then inspect the worst regressions manually. If the graph is multi-agent, also inspect whether routing changed unexpectedly. A quality score that stays flat while latency doubles is still a regression.
📌 Release gate. Do not rely on a single average score. Review score deltas, latency, token usage where available, and the specific examples that flipped from pass to fail.
candidate_config = RunnableConfig(
 tags=["tutorial", "supervisor-graph", "candidate"],
 metadata={
 "app_version": "2026.05.20-candidate",
 "environment": "staging",
 "workflow": "research-writer-supervisor",
 },
)


def candidate_target(inputs: dict) -> dict:
 result = app.invoke(inputs, config=candidate_config)
 return {"output": result.get("final_answer", "")}

candidate_results = client.evaluate(
 candidate_target,
 data=dataset_name,
 evaluators=[deterministic_checks, llm_judge],
 experiment_prefix="supervisor-graph-candidate",
)

print(candidate_results)
Stage 7: Wire alerts and automations for regressions
A production observability stack needs a feedback loop after deployment, not just before it. LangSmith includes Automations in its product surface, documented in the official docs, for triggering actions based on conditions in your projects and runs. The exact automation you choose depends on your team’s workflow, but the principle is straightforward: when a monitored score drops or a run pattern spikes, notify the people who own the graph.
There are two common alerting patterns. The first is online monitoring: watch production traces for latency, error, or score anomalies. The second is release monitoring: run a scheduled evaluation against a fixed dataset and alert when the candidate underperforms the baseline. If your team already uses CI, scheduled evals are often the easiest place to start.
Because automation targets and notification channels can change, the safest recommendation is to configure them in the LangSmith UI using the current product docs at docs.smith.langchain.com. Keep the alert threshold simple at first: for example, notify when the average judge score falls below your accepted baseline or when a required-terms evaluator starts failing on previously stable examples.
⚠️ Alert fatigue. Start with one or two high-signal alerts. If every prompt tweak triggers a page, the team will stop trusting the system.
| Alert target | Signal | Suggested first threshold |
|---|---|---|
| Quality regression | Average eval score | Below baseline on the fixed dataset |
| Formatting breakage | Deterministic evaluator failures | Any new failure on previously passing examples |
| Latency drift | Run duration trend | Sustained increase versus recent baseline |
Stage 8: Production hardening tips for multi-agent teams
A few habits make LangSmith much more effective in real deployments. First, keep your graph nodes semantically meaningful. If everything happens inside one giant node, the trace tree will not help you isolate failures. Second, version prompts and graph changes explicitly in metadata so you can compare runs across releases. Third, separate staging and production projects or at least tag them consistently.
It also helps to define a small set of canonical tasks for each workflow and run them on every change. For a supervisor graph, include at least one prompt that should route to each worker, one prompt that should terminate quickly, and one prompt that stresses formatting constraints. Those examples become your early-warning system.
If you are still deciding whether to standardize on LangSmith or a more vendor-neutral observability layer, our LangSmith vs. Langfuse guide covers the tradeoffs. If your team is going deeper on graph design itself, pair this tutorial with our LangGraph multi-agent walkthrough.
Pros
Cons
{
 "app_version": "2026.05.20",
 "environment": "prod",
 "workflow": "research-writer-supervisor",
 "prompt_version": "writer-v3",
 "graph_version": "graph-v2",
 "tenant_tier": "enterprise"
}
Where to go from here
At this point you have the core pieces of a LangSmith production setup: a traced LangGraph app, explicit spans for custom logic, a dataset for repeatable evaluation, an LLM-as-judge rubric, and a path to regression alerts through LangSmith automations. That is enough to move from “the demo worked once” to a workflow your team can actually ship against.
The next upgrades are straightforward. Add more realistic retrieval and tool nodes, expand the dataset with real failure cases from staging, split your evals into routing, formatting, and answer-quality buckets, and review experiment diffs before every release. If you want to deepen the graph side, start with LangGraph’s docs and our builder’s guide. If you want to compare observability stacks, read our LangSmith vs. Langfuse comparison. For the product surface itself, keep the official LangSmith docs bookmarked at docs.smith.langchain.com.
📌 Next step. Take one real production prompt that has failed before, add it to your LangSmith dataset, and make it part of every release evaluation from now on.
Frequently asked questions
No. LangSmith can trace and evaluate applications built with LangChain and custom logic, and its docs cover tracing and evaluation more broadly. LangGraph is useful when your app has explicit state, routing, and multi-step workflows. See LangSmith docs and LangGraph docs.
Start with a small fixed dataset that reflects real failure modes: routing ambiguity, formatting constraints, and representative user tasks. Then combine deterministic checks with a narrow LLM-as-judge rubric. LangSmith’s documentation on datasets and evaluation is the right starting point: docs.smith.langchain.com.
Use separate projects where possible, or at minimum attach consistent tags and metadata such as environment=staging or environment=prod on every run. LangSmith’s tracing setup and project model are documented at docs.smith.langchain.com.
LangSmith includes automations in its hosted product, and the official docs describe how to use them. A common pattern is to run scheduled evaluations on a fixed dataset and notify the team when scores fall below an accepted baseline. Start with the product documentation at docs.smith.langchain.com.
Primary sources
- LangSmith documentation — LangChain
- LangSmith product site — LangChain
- LangGraph documentation — LangChain
- LangChain Python documentation — LangChain
Last updated: May 20, 2026. Related: Observability.